CarAudioRemoval
CarAudioRemoval
  • Home
  • Car Stereo Removal Guides
    • Audi
    • BMW
    • Chrysler
    • Citroen
    • Daewoo
    • Daihatsu
    • Fiat
    • Ford
    • Honda
    • Hyundai
    • Isuzu
    • Jeep
    • Kia
    • Land Rover
    • Mazda
    • Mercedes Benz
    • Mini BMW
    • Mitsubishi
    • Nissan
    • Peugeot
    • Porsche
    • Proton
    • Renault
    • Rover
    • Saab
    • Seat
    • Skoda
    • Subaru
    • Suzuki
    • Toyota
    • Vauxhall
    • Volkswagen
    • Volvo
    • Fuse Box Finder
  • In Car Fitting Guides
    • About Our Fitting Guides
    • Head Unit Integration
    • Speakers Integration
    • Bluetooth Kit Integration
    • Sub & Amp Integration
    • Head Unit Removal Using Release Keys
    • In Car Dashboard Cameras
    • Dashboard Camera Installation Advice
    • Sourcing a 12v Live from a Vehicles Fusebox
    • Specialist Tools Needed To use Our Removal Guides
    • Multiplex Wiring/ CAN BUS Systems Explained
  • In Car Technical Information
    • Introduction to Car Audio
    • Car Audio Explained
    • Head Unit Wiring
    • ICE Explained
    • Car Aerial Explained
  • How To Change Wipers/Bulbs/Battery
    • How to Change Car Wiper Blades
    • How to Change a Car Headlight Bulb
    • How to Change a Car Battery
  • MOT Test Checklist Guide
  • Contact
  • About
  • Policy

mot checklist

MOT Test Check Guide
DIY MOT Checklist Guide, Hints & Tips to help get your Vehicle through the MOT test

Enter your reg check
Here we have a guide to help you get your vehicle through its MOT test, this is basically a checklist of areas you can examine on your vehicle before submitting it for the dreaded MOT. Obviously its not possible to check the vehicle to the standard as a professional MOT examiner, however working through the following checks will enable you to identify any problem areas or faults prior to the test.
​

CHECKS CARRIED OUT FROM INSIDE THE VEHICLE

  • Check the operation of the handbrake by pulling it upwards, excessive travel (too many clicks) indicates a worn handbrake cable or incorrect cable adjustment.
  • Check the sideways movement of the handbrake lever (if any), by lightly tapping the lever sideways, also check the security of the handbrake mountings (if exposed).
  • Check the brake pedal, depress the pedal & check that it doesn't slide back to the floor, this indicates a master cylinder fault. If all is ok wait a few seconds, depress the pedal again, if the pedal travels nearly to the floor before firm resistance is felt, adjustment to the brakes may be required, if the pedal feels spongy, this indicates air in the hydraulic brake system (if fitted) which will need removing by bleeding.
  • Using your hands check that the brake pedal is secure & in good condition, also check for signs of brake fluid leaks on the pedal, floor or carpets, this would indicate failed seals in the brake master cylinder.
  • Examine the steering wheel for ant fractures or looseness on the hub.
  • Turn the steering wheel from side to side, also check the movement up & down, any movement could indicate wear or a loose retaining nut. Check that the steering wheel is not loose on the steering column, if it feels loose this could indicate wear in the column support bearings or couplings.
  • Check that the windscreen is free of cracks or any other significant damage within the drivers field of vision (roughly a rulers length 30cm width, directly in the drivers field of vision, roughly 10cm from the top of the windscreen all the way to the bottom, imagine a large upturned rectangle 30cm wide). Small stone chips are acceptable. Also, rear view mirrors must be secure & intact, also capable of being adjusted.
  • Check that the drivers side sunvisor is capable of being adjusted & can be stored in the upwards position.
  • Check that all seat belts front & rear are free from any major cuts, tears or deterioration. Check all seat belt buckles by fastening & unfastening all belts into the buckles. Also check the retaining mechanism of the front seat belts.
  • Check that all seats are securely attached to the vehicles floor with no loose bolts or fixings.
  • Check that both front doors are able to be opened & closed from outside & inside, also & check that they latch securely when closed. 

CHECKS CARRIED OUT IN & AROUND THE VEHICLE

  • Check that the number plates are in good condition & secure to the vehicle, also that the numbers & letters spacing is legal.
  • Check the boot can be opened & securely closed & latched.
  • Check that the fuel cap is secure & if applicable can be locked & unlocked.
  • Switch the ignition on & check that the horn is operational.
  • Check the windscreen washers & wipers, examine the wiper blade rubber, if perished, renew for new blades. See our guide on How to Remove & Re-fit Wiper Blades.
  • Check the operation of all the lights on the vehicle, turn the hazard switch on & examine all the indicator lights are operational, also turn on & examine individually the headlight sidelights (first click on light toggle), dipped headlights standard driving beam (second click), full beam headlights used for motorway driving etc (last click on light toggle). Either ask a friend to help, or reverse your car to a glass fronted building to check the operation of reverse lights, tail lights & brake lights. Any damaged bulbs should be replaced. See our guide on How to Remove & Re-fit a Cars Headlight Bulb for help on headlight bulb removal & re-fit. Finally check that the number plate lights are working.
  • Check that all the vehicles light cluster lenses are secure, clean & undamaged.
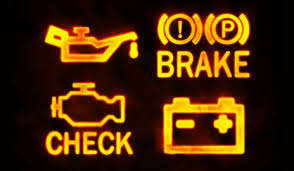
  • Check (if applicable) that when the vehicles ignition is turned on, the vehicles ABS warning light should illuminate & extinguish after a few seconds.
  • Check the brake fluid reservoir (under bonnet) is topped up to required level, is securely fitted & is mounted correctly.
  • Check the water/anti-freeze fluid reservoir (under bonnet) is topped up to required level, is securely fitted & is mounted correctly.
  • Check the power steering fluid reservoir (if applicable/under bonnet) is topped up to required level, is securely fitted & is mounted correctly.
  • Check that the oil is topped up & within the required level by checking on the oil dipstick (if applicable).
  • Check each shock absorber by depressing each corner of the vehicle in turn, and release, the car should then rise & then settle in its normal position, any other behavior from the shock absorber/spring could identify a fault which will result in a test fail.
  • Check all tyres are in roadworthy condition, examine the tyre sidewalls & tread areas of each tyre in turn, check for cuts, tears, lumps etc
  • Check the tyre tread depth is within the legal limit which is at least (at the time of writing) 1.6mm.
  • Check the emissions of the vehicle by starting the engine & raising the revs to around 2500 rpm for 20 seconds, then allow the engine speed to return to idle & check from the rear of the exhaust tailpipe for any obvious smoke & emissions, also if the idle speed seems much too high, or if dense blue or clearly visible black smoke occurs for more than 5 seconds or so the vehicle will most likely fail the test. As a rule of thumb blue smoke indicates oil being burnt (eg engine wear), whereas black smoke indicates unburnt fuel (dirty air cleaner element, or other carburettor or fuel fault/issue,(for petrol models). Emissions can be reduced by placing an additive (for example, Redex) into the fuel a day or so before the test & giving the vehicle a good run.


 Following these simple checks you can prepare your vehicle for the MOT test & increase your chances for passing the test.

 Please see the YouTube video links below for some more helpful advice on getting your vehicle through its MOT test.
cars warning light example
MOT test certificate
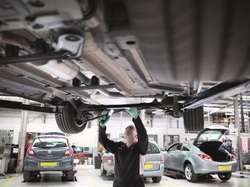
MOT Checks
Picture
 Also see our guides on:

How to Remove & Re-fit Car Wiper Blades

How to Remove & Re-fit a Car Headlight Bulb

How to Remove & Re-fit a Car Battery
Powered by Create your own unique website with customizable templates.